| What is “Tech Neck”? Tech Neck is a condition categorized as chronic neck and shoulder pain/discomfort as a result of frequent use of smartphones, tablets, and computers. Over time, Tech Neck may develop into “Anterior Head Carriage.” Anterior Head Carriage occurs when our head and neck our head and neck gradually shift forward out of alignment compared to the rest of our body. From the side view, our ears should line up with our shoulders with a normal posture. The Anterior Head Carriage increases stress on the neck, upper back, and shoulders resulting in issues such as neck pain, stiffness, and headaches, and could lead to neurological problems. |

On average, our noggins weigh between 8-12lbs (it varies because bodies vary) but added stress is placed on the spine and neck muscles with an increase of angles of head tilt. It’s crazy to believe tilting our heads 60 degrees to text our bae causes our neck muscles to work as if they are lifting a 60lb bag of potatoes!

Posture and the Ergonomic Workplace
All is not lost! There are ways to help our techy necks! Adopting good posture habits, ergonomic adjustments, and performing corrective exercises will help address our anterior head carriage.
Do you have an ergonomic workspace?
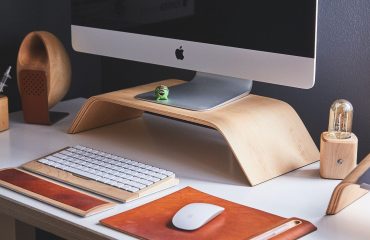
An ergonomic workspace optimizes our efficiency, comfort, and well-being during our long working hours.
Here are some key elements of an ergonomic working environment:
- 1. Proper Desk/Chair Height
- Ensuring your desk and chair are at the correct height promotes a neutral wrist and forearm position. Forearms should be parallel to the floor and wrists should rest in a neutral position Feet should be flat on the floor or elevated on a footrest.
- 2. Ergonomic Chair
- Make sure you have an adjustable chair with lumbar support, armrests,
** If you can’t afford an ergonomic chair, consider purchasing lumbar support pillows for your chair.
- Make sure you have an adjustable chair with lumbar support, armrests,
- 3. Proper Keyboard and Mouse Position
- Keyboard and mouse should be positioned at a comfortable height to prevent strain on the arms, wrists, and shoulders.
- 4. Computer Monitor
- Your computer monitor should be between 18-24 inches away from you. The top of your computer monitor should be at eye-level or slightly tilted away.
- 5. Proper sitting posture
- It’s important to maintain good posture when working at your desk. This will help prevent back and neck pain.
- 6. Breaks
- Take a break to stretch and walk around every 25 minutes. Frequent breaks will prevent stiffness and pain from creeping up on us.
Fun Tip: Drinking more water will help you take more breaks! The more water you drink the more you’ll have to get up to use the restroom. General rule of thumb is we should be drinking about half of our body weight in ounces each day. For example: if you weigh 150lbs you should drink about 75oz of water.
Here’s a good diagram to visualize ergonomic desk posture:

Credit: Creating the Perfect Ergonomic Workspace- The ULTIMATE Guide – Ergonomic Trends
Another thing to consider is purchasing a standing desk. A standing desk may help with reducing back, shoulder, and neck pain. Using a walking pad with your standing is also a good way to keep yourself from being sedentary and prevents health problems caused from prolonged periods of standing/sitting.
Let’s Prevent/Reduce Tech Neck at Home!
So now that we have an ergonomic working environment, we need to work and stretch that body-ody-ody to prevent or reduce Tech Neck.
The Stretches
Upper Trapezius Stretch
This stretch is pretty simple to do. In a seated or standing position, tilt your ear to your shoulder, you should feel stretch on the opposite side. For an added stretch, place your opposite hand on top of your head and rest it there. Do not pull on your head and neck.

Sternocleidomastoid Stretch
The Sternocleidomastoid muscle is responsible for flexing, rotating, and tilting the head.
To stretch this muscle, tilt your head to left side and rotate your chin upwards to the right side until you feel a slight stretch on the right side of your neck. Almost feels like you’re trying to hold onto a rotary phone hand free. Hold this position for 15 to 30 seconds. Repeat on the other side. For an extra stretch you can place your opposite hand on the top of your head.

Levator Scapula Stretch aka “The Sniffer”
The Levator Scapula muscle elevates the shoulder.
Complete this stretch by lowering your chin in towards your chest and rotate your nose towards your right armpit. You should feel a stretch on the left side of your neck. For an added stretch you can gently place your right hand on the top of your head. Hold the stretch for 15-30 seconds and repeat on the opposite side.

Try those stretches out!
The Corrective Exercises
Chin Tucks Exercise
Strengthening our Deep Neck Flexor muscles helps with stability of the neck and maintaining proper posture. An exercise that helps strengthen the deep neck flexor muscles is called Chin Tucks. I perform this exercise when I am stuck in traffic or stopped at a red light.
Here’s what you do:
While looking straight ahead, place two fingers at the bottom of your chin. Gently, give yourself a “double chin” by retracting your head backwards. Use your fingers will assist you with pushing your head straight back.
** Note many people do this exercise wrong but either tilting their head up or down.
Hold the end position for 2-5 seconds. Relax your neck and bring it back to center. Try not to jut your chin forward. Complete 2-3 sets of 10 repetitions.

Y/T/W Exercises
Strengthening the back improves posture, enhances support and stability for our spine, and helps alleviate pain. Y/T/W exercises activate and strengthen our mid and lower trapezius muscles. Strengthening the mid and lower trapezius muscles stabilizes the shoulder blades and helps correct hunched postures. What is Y/T/W exercises? Well, get ready to channel your inner cheerleader! You’re going to be forming these letters with your body!

The Y/T/M exercises may be performed while lying face down on a bench/ground or other ways such as using TRX bands. Give yourself a thumbs up with these exercises. For the Y exercise, you are going to slowly raise your arms up at a 45-degree angle making a Y with your body. YMCA the heck out of it (2-3 sets of 10 repetitions that is). Lower your arms to the starting position. T exercise, you make a T with your arms (you should look like a little t), pretty self-explanatory. However, W’s are more complicated so I’m just going to link a YTW YouTube video! CLICK ME!
I’ve also added a TRX YouTube video HERE
If you have any questions or concerns about the exercises let one of us know! We are happy to help and want to make sure you’re doing your exercises correctly!


